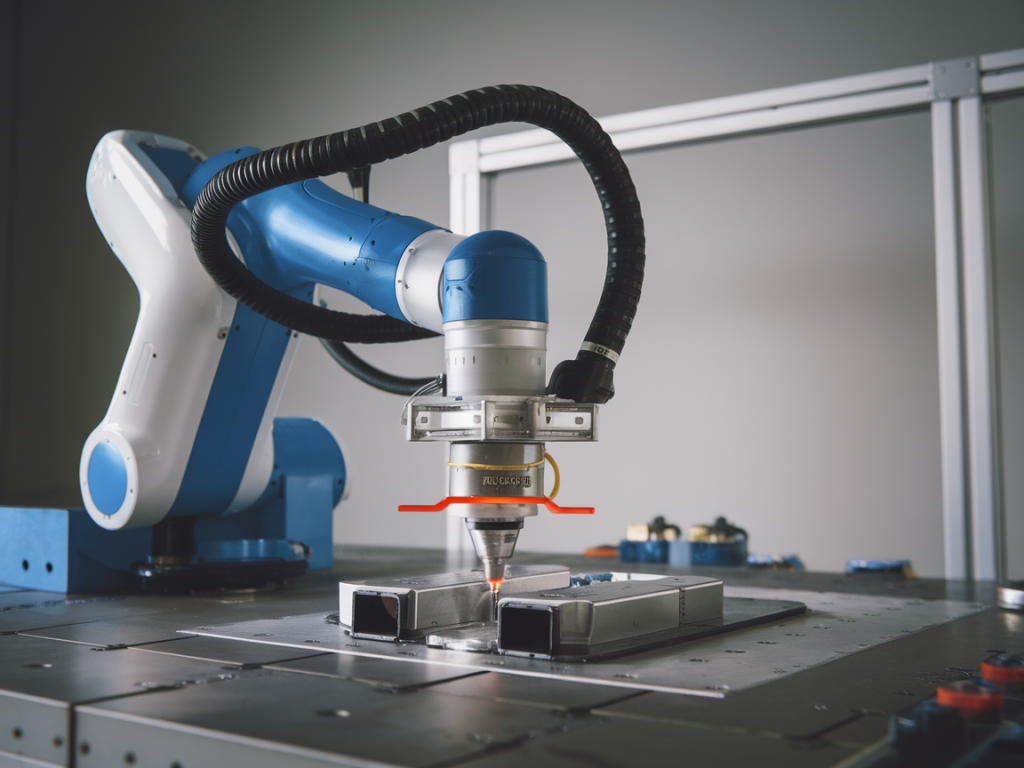
I’ve seen the same scene too many times: a collaborative robot (cobot) running a routine that should be smooth and quick, and yet rejects keep piling up. Operators blame parts and fixtures; engineers blame sensors and components. But more often than not the root cause is the cobot’s force‑limiting and collision detection tuning — set in a way that prioritizes an overly conservative safety margin at the cost of throughput and product quality.
Force‑limiting on cobots is a fantastic safety capability. It lets machines work close to humans, tolerate small contacts, and avoid catastrophic failures. But force‑limiting is not a “set and forget” checkbox. If thresholds, filters, payload settings, and motion profiles aren’t tuned to the real task, you get two common problems: nuisance trips that interrupt cycles and subtle tool deflection that causes mispositioning and rejects.
Why force‑limiting causes rejects — the behavioral root causes I watch for
When a cobot trips or behaves compliantly in the wrong place, it usually falls into one (or more) of these categories:
Incorrect robot model / payload / TCP calibration: The robot’s controller uses the mass and inertia of the tool to interpret torque and force readings. If the payload or Tool Center Point (TCP) is wrong, normal accelerations look like collisions.Thresholds set without context: A single fixed force threshold for an entire program ignores the fact that insertion steps, touch checks, and fast transits generate very different signatures. That leads to either too sensitive or too permissive behavior.Over‑filtered or under‑filtered signals: Aggressive filtering smooths spikes but delays detection. Too little filtering turns harmless vibrations into false collisions.Poor motion profile and compliance tuning: High stiffness combined with a hard stop strategy produces impact forces on contact. Conversely, too much compliance lets the tool deflect, causing misalignment and rejects.Safety strategy mismatch: Using full stop (safety‑stop) instead of reduced‑speed modes where appropriate kills throughput unnecessarily.In my implementations across automotive and electronics lines, these misconfigurations were the hidden variables behind line rejects more often than defective parts or fixturing geometry.
The three tuning changes that actually fix rejects and improve throughput
If I can only make three changes to a cobot installation to stop rejects and recover throughput, they are these. They are ordered because they build on each other: reliability of sensing depends on a correct model, and safe responsiveness depends on both sensing and motion tuning.
1) Correct the robot model: TCP, payload, and inertia — make the controller understand the toolWhat I do:
Measure tool mass and the center of mass (CoM) properly and enter those into the robot controller. Don’t rely on the CAD mass unless you’ve validated it on a scale.Calibrate the TCP with a proper method (touch plate, laser tracker, or manufacturer’s calibration routine). A few millimetres of TCP error can look like sideways contact at the force sensor.Where the robot allows, input inertia parameters or use the controller’s inertia estimation routine.Why it helps:
Acceleration and centrifugal forces are interpreted correctly, reducing false positives. The controller knows which torques are expected during a normal motion and which are anomalies requiring intervention.2) Make thresholds contextual and adaptive
Instead of one threshold for the whole program, I split detection logic by task phase and use adaptive thresholds tied to velocity and expected contact stiffness.
Define categories: fast transit, touch‑down/registration, press/insert, and small bump. Each category gets its own force and torque thresholds.Implement speed‑scaled thresholds: allow higher short‑term force during high acceleration segments but expect lower static forces during registration steps.Use a short moving‑window energy metric (e.g., root mean square of force over 50–200 ms) to detect sustained contact vs transient spikes.Practical numbers I use as starting points (adjust per application):
| Phase | Force Threshold (N) | Detection Window |
|---|
| Fast transit | 50–120 | 20–50 ms |
| Touch/registration | 5–30 | 50–200 ms |
| Press/insert | 30–150 (task dependent) | 100–300 ms |
Why it helps:
Contextual thresholds prevent normal dynamics from being interpreted as collisions while remaining sensitive where you need precision.3) Tune motion and compliance: stiffness, damping, and smarter safety responses
Even with perfect sensing, motion behavior determines how forces translate into part contact and alignment. I tune three motion aspects in concert:
Compliant control (Cartesian stiffness): Reduce stiffness in directions where small compliance improves registration (e.g., along insertion axes) and keep higher stiffness where position control is critical.Damping and filter time constants: Add damping to avoid oscillation when the tool contacts a surface. Use shorter filter windows for detection but longer for trending, so you get responsive protection without nuisance trips.Safety action selection: Use reduced‑speed / restrict‑motion instead of full stop where appropriate. Implement recoverable states: for example, on a light unexpected contact, back off 2–5 mm, zero the force baseline, and retry the insertion rather than logging a reject.Typical tuning approach I follow:
Start with Cartesian stiffness about 20–50% of nominal in the insertion axis, higher in orthogonal axes.Set damping to 0.7–1.0 critically damped equivalent for the contact frequency you expect.Test sequence: step contact at increasing speeds, observe deflection and settle time, and adjust stiffness/damping until you get repeatable seating without excessive force.Why it helps:
Better compliance prevents hard impacts and misalignment. Using recoverable safety actions keeps the line moving and avoids unnecessary rejects.How I validate tuning changes on the line
I never deploy tuning blindfolded. My validation checklist looks like this:
Instrumented run with data logging enabled (force, torque, joint torque, TCP position, speed).Run a representative batch of parts (100–500 cycles depending on risk) and record every stop, reduced‑speed event, and part rejection.Tag each event with the program phase and operator notes. Correlate force signatures with phase to refine thresholds.Introduce controlled perturbations (slightly misaligned part, variation in fixture clamp force) to ensure the system tolerates realistic variance.Example metrics I aim for:
| Metric | Target |
|---|
| False trips per 10k cycles | < 5 |
| Rejects caused by mispositioning | 0 (for robust fixturing and tuning) |
| Mean cycle time impact vs rigid baseline | < 5–10% (net positive when retries avoided) |
Tools and product notes
Most major cobot platforms support the practices above. On Universal Robots and KUKA LBR models you’ll find configurable Cartesian stiffness and per‑phase safety inputs. For force sensing, integrated torque estimation works well for light tools, but I often prefer a physical 6‑axis F/T sensor (ATI, Robotiq) for high‑precision insertion tasks. For data logging and analysis, simple CSV exports from the robot controller combined with Python or MATLAB scripts let you visualize force signatures per phase and iterate quickly.
One thing I caution against: don’t over‑filter in the controller thinking you’ve fixed false positives. Over‑filtering masks real collisions and increases stop latency — which harms safety. Tune sensors and motion together, not in isolation.
If you’d like, I can share a downloadable checklist and a sample logging template I use when commissioning cobots for assembly lines — it speeds up the tuning loop by an order of magnitude and keeps stakeholders aligned on acceptance criteria.